IVAO: Setup
IVAO is a flight network with a mainly European community. It offers the possibility for pilots who join it to fly with other pilots on the one hand and on the other hand to access the services of virtual air traffic controllers.
There are many tutorials and videos on IVAO, here we will try to simply summarize what is needed and how to use IVAO to make a controlled flight.
Preparation
1 - Open an account with IVAO as a pilot, write down its "VID" and password.
2 - Load and install the software:
Altitude: interface between the pilot and the controllers: installs 2 software that must be launched with the simulator:
IVAO Pilot UI and IVAO Pilot Core
https://api.ivao.aero/v2/softwares/altitude/5/files/latest/download
MTL packages: to view aircraft under IVAO control in the simulator. The launch of the MTL program allows you to choose the planes and liveries you want to see on the tarmacs.
https://download.ivao.aero/v2/softwares/mtl/58/files/latest/download
It is recommended to read the related documentation.
IVAO requires, even for VFR flights, that a flight plan be loaded via their "Flight Plan System" web page: https://fpl.ivao.aero/flight-plans/create. This can be done automatically via a Simbrief option.
In the end, we must have in the Windows desktop the following 3 programs:

- You must launch Pilot UI after each start of the simulator to connect to IVAO.
- in principle, IVAO Pilot Core is launched automatically by Pilot UI. If not, it will need to be run.
- MTL installer is only used if you want to modify the list of IVAO aircraft liveries.
Prepare the flight plan
IVAO imposes a lot of rules (as in real aviation). You have to check them out on their site. Attention, some documents are "obsolete", at least for MSFS.
Note: to fly with IVAO it is imperative that you have created a flight plan and that your plane is equipped with a transponder.
If you use Simbrief to create a flight plan, at the bottom of the OFP page, a button allows you to automatically generate the FPS for IVAO (and for other products like VATSIM).

To submit the FPS created (manually or by Simbrief) to IVAO, you must click on the "Submit FPL" button. A page shows you the list of your FPLs already recorded: a click at the end of the line on the "Download FPL" button sends your flight plan to the controller of your departure airport.

If your simulator is not yet launched nor IVAO, you will find your flight plans at this address:
https://fpl.ivao.aero/flight-plans
Use
Once the flight plan is ready, the simulator is launched and the plane is positioned on a tarmac post (compulsory, it is not authorized to stand at the end of the runway with the engines running). Note the extension number (or the zone in VFR) that you will have to indicate at the first communication.
NB: to communicate with the tower, you need at least one radio in service.
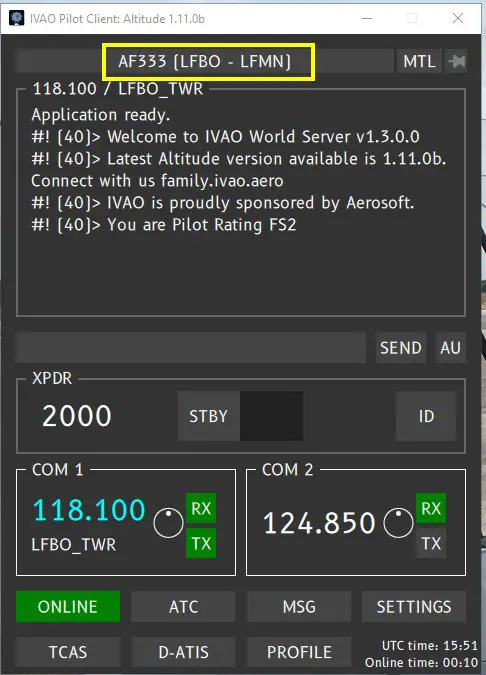
Launching Pilot UI (and Pilot Core) opens the initial IVAO window (case of the flight plan not transmitted to IVAO).
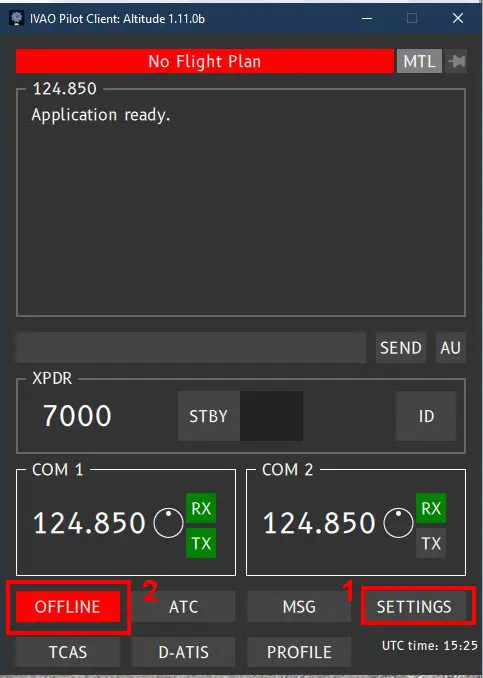
Nothing is loaded yet, neither your callsign nor your flight plan nor the frequency of the tower. Before going ONLINE (2), check your connection and communication parameters by clicking on SETTINGS (1) which opens a specific sub-window.

Check that the microphone and the loudspeakers are active and choose the PTT key (to transmit) if this has not been done during a previous flight.
NB: the "sub-windows" start by clicking on the main window.
ON click on the OFFLINE button (1) which opens the connection window.
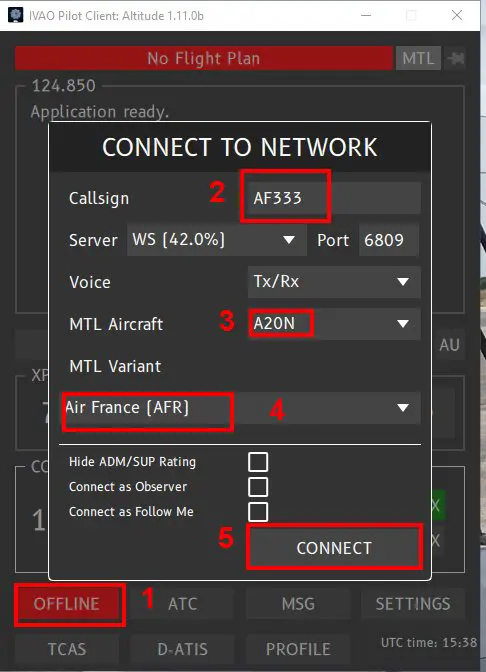
- Intro of the flight number (2) which will serve as callsign in communications.
- Selection of the type of aircraft (3) for the visual of other pilots on IVAO
- Airline selection (4)
- click on the CONNECT button (5) to send the parameters to the controller.
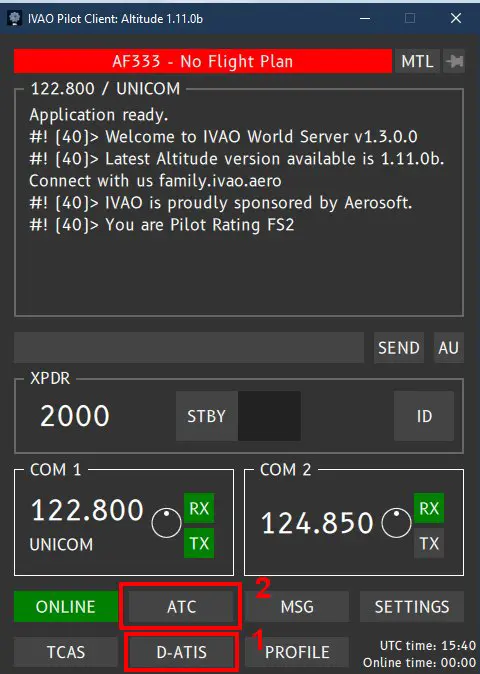
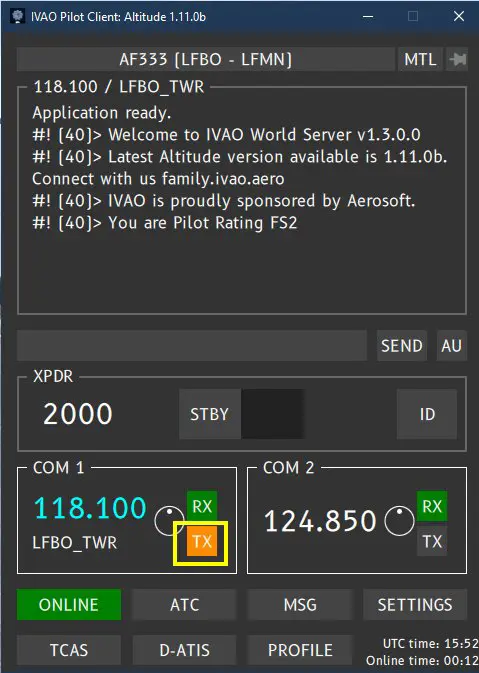
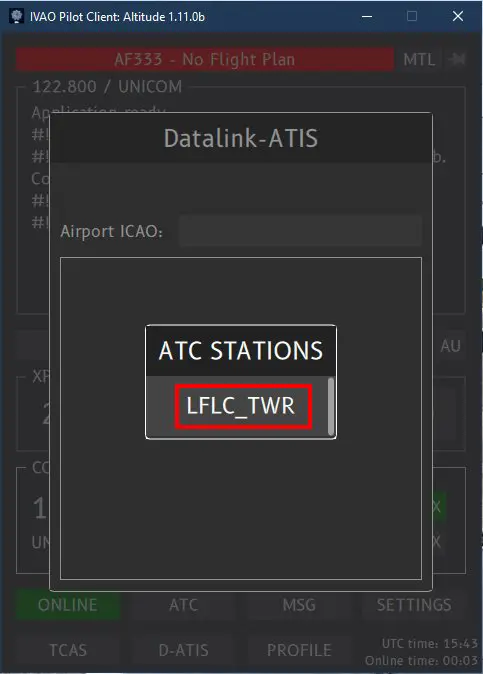
We will now retrieve the ATIS (1) data, if they exist. Note the ATIS code (Echo in the example) which is requested on first contact.

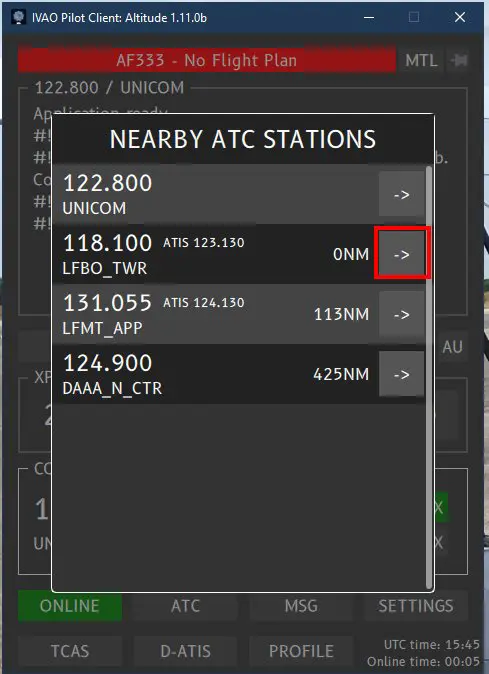
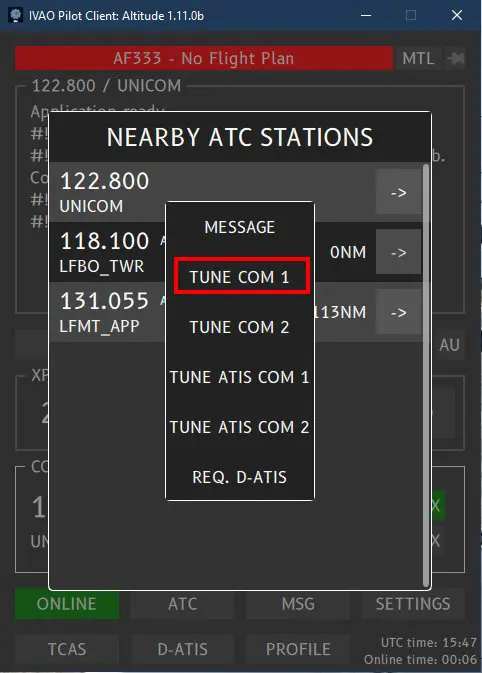
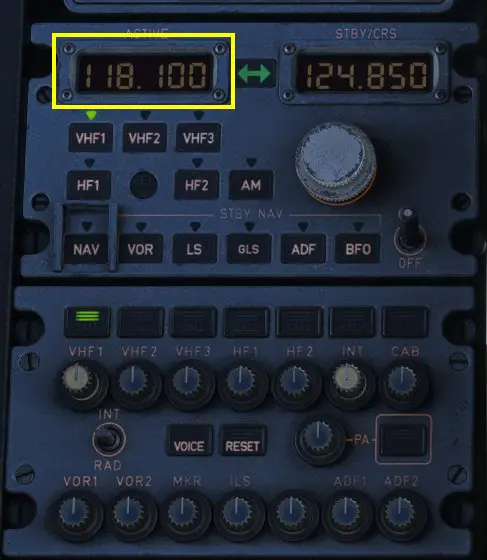
Then we look for the frequency of the tower of our departure site and we validate the automatic update of this frequency in the plane (here COM1).
You must now enter the flight plan that you have previously prepared (or not).
As mentioned before, it is in the page https://fpl.ivao.aero/flight-plans

We select the right flight plan and click on the Download FPL button.
The IVAO window has updated.
If you are ready for pushback and start-up, now is the time to request tower clearance by sending your first message by pressing the key you have selected for the alternate.