GNS530, flight plan and use with Justflight's PA28 Arrow IV Turbo autopilot
JustFlight has equipped its Piper PA28 with the Garmin GNS530. The latest version of the Arrow IV turbo allows it to be used on autopilot, which is an undeniable plus.
This tutorial consists of 2 parts:
- loading of a flight plan in the GNS530 (for those who do not know this GPS),
- use of the flight plan by the PA of the PA28 Arrow IV.
Part 1: loading a flight plan into the GNS530
As soon as it is switched on, the GPS enters a start-up sequence. Of the 4 screens in this sequence, two require confirmation with the ENT key.
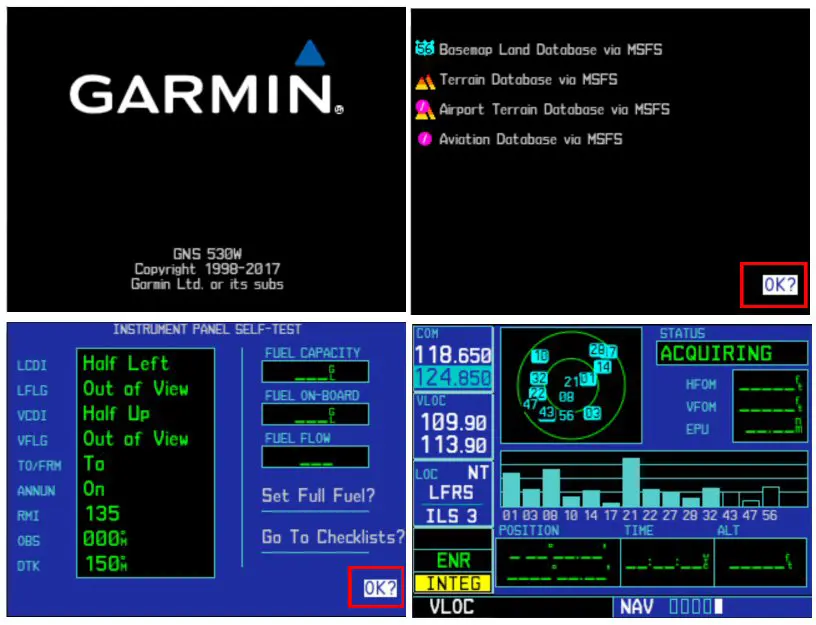
The next screen shows on the map the position of the aircraft on the selected terrain and the nearby WPs.
For this tutorial we have chosen a flight between Nantes (LFRS) and Brest (LFRB), the plane being positioned at the threshold of runway 21 in Nantes.
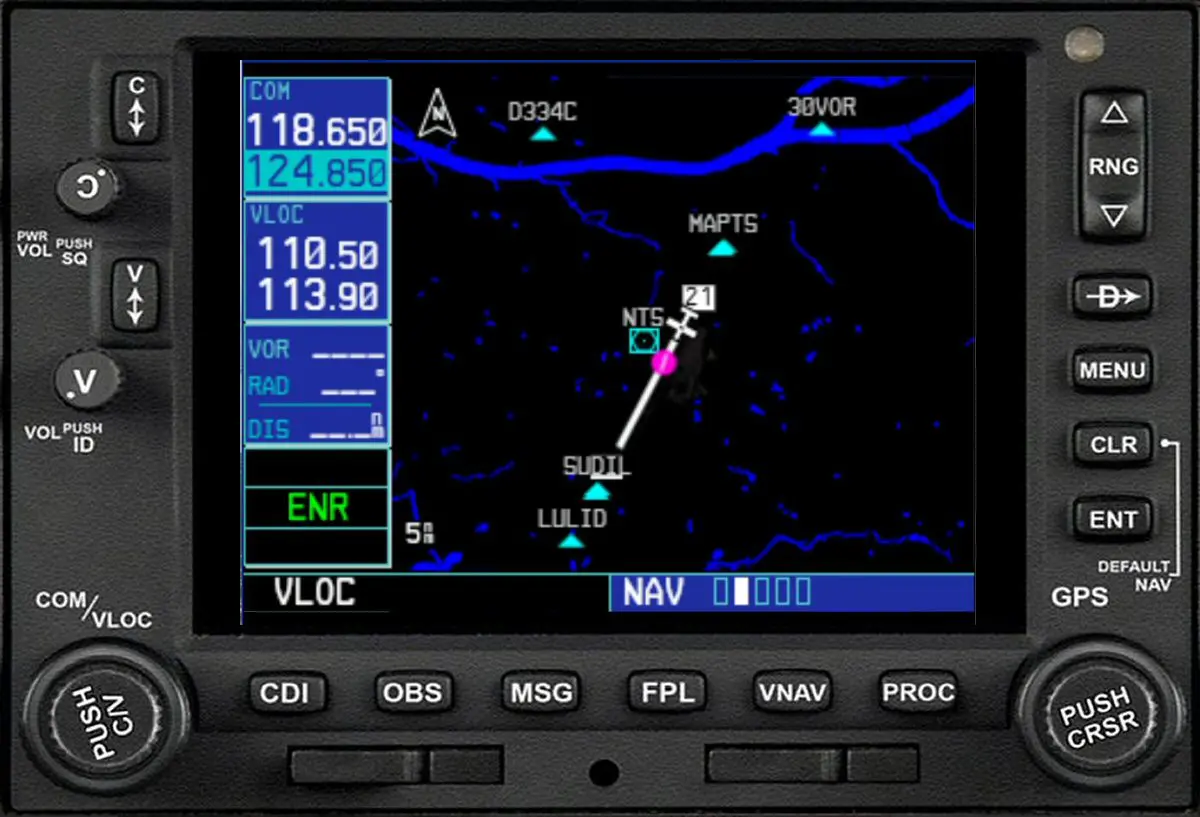
To enter the flight plan you must press the FPL key which will display an "empty" flight plan.
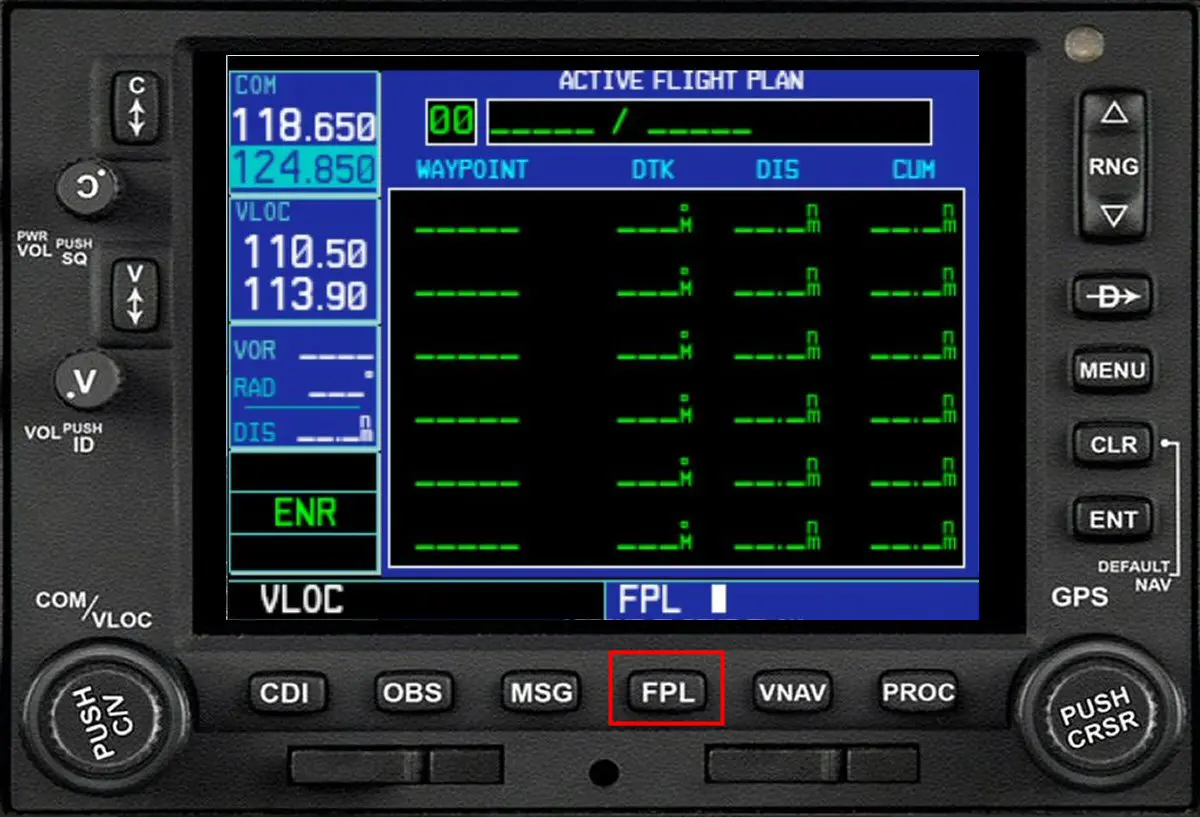
Pressing the "PUSH CRSR" button highlights the first line to be filled.
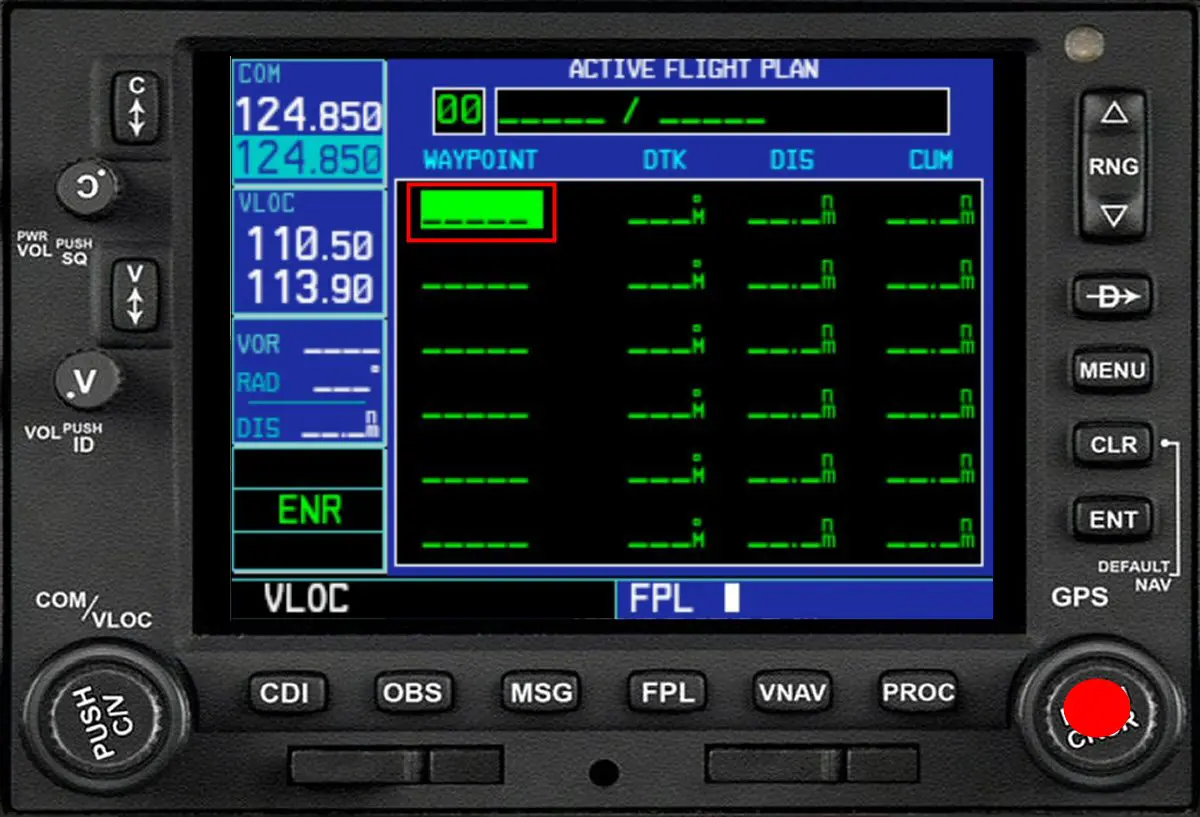
By turning the small crown around this button, a pre-filled data entry window is displayed (the GPS, knowing its position, suggests the two letters of the country in which it is located. LF for France).
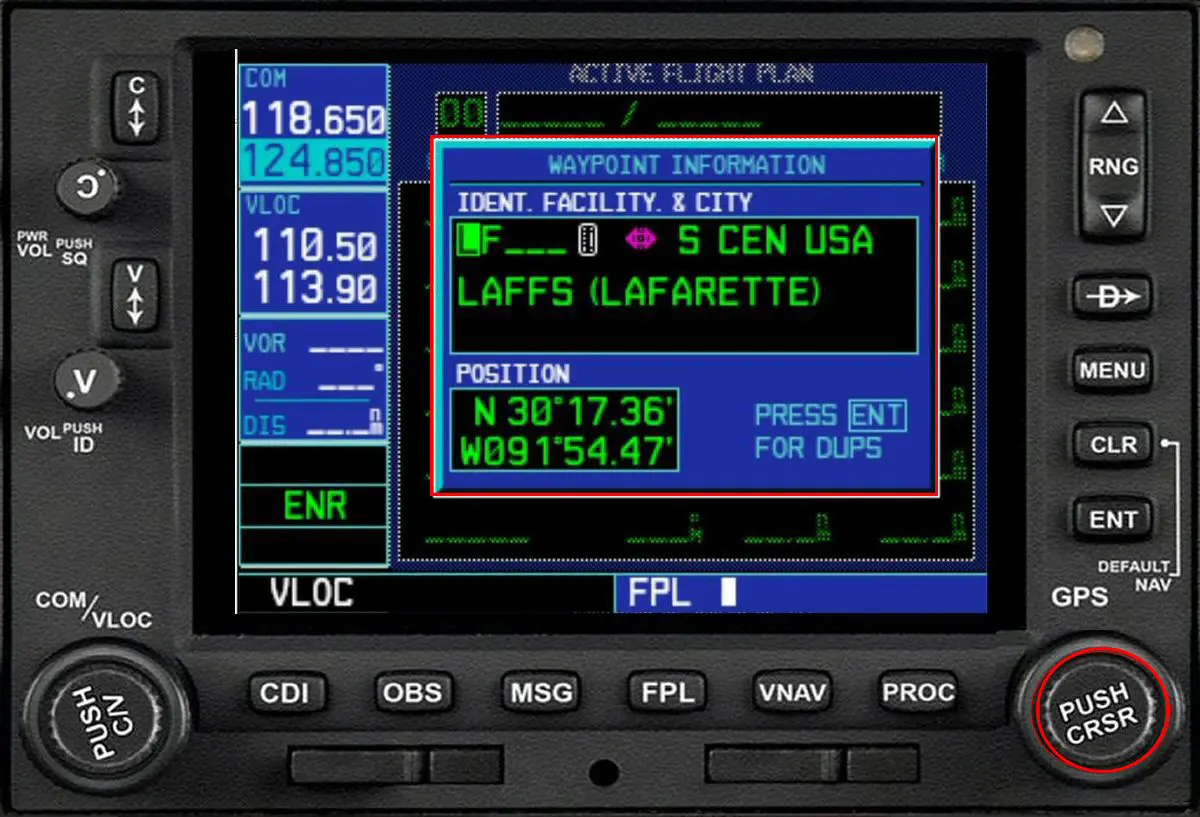
To move in the line to be filled, this time we use the large crown of the PUSH CRSR button.
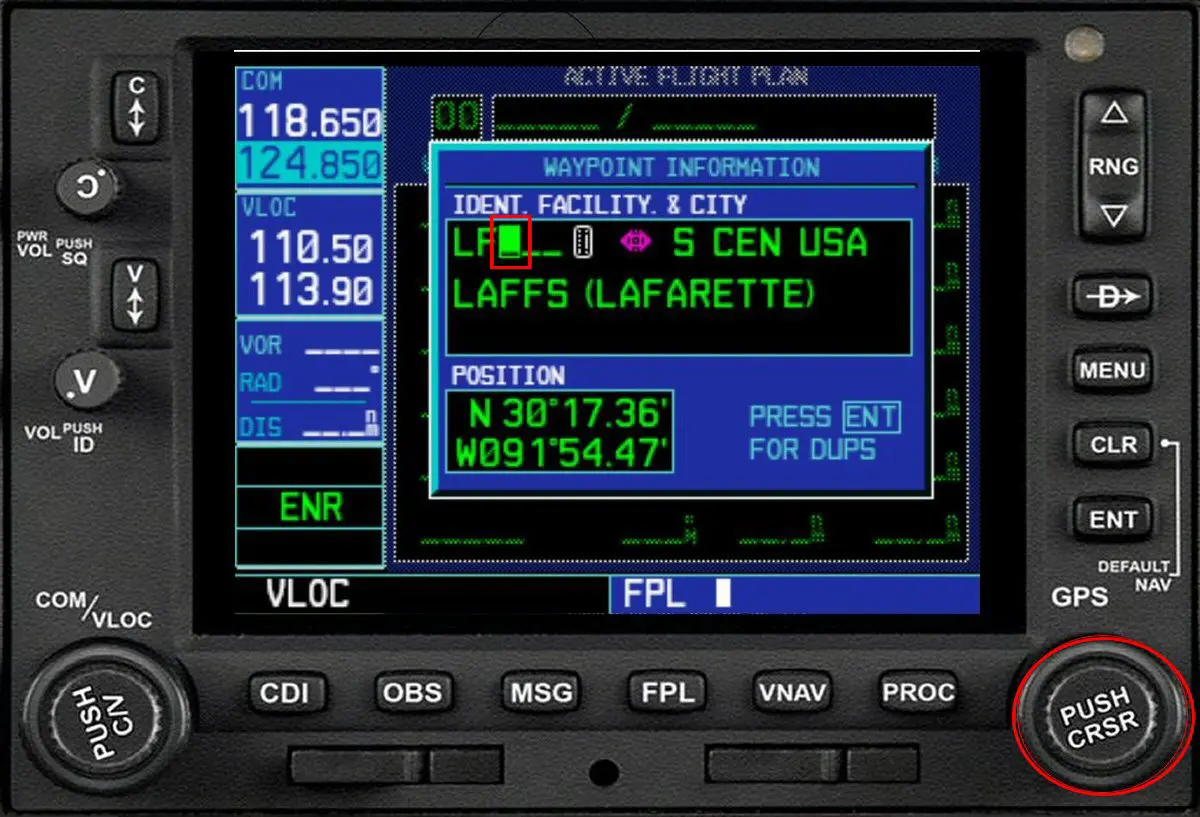
Once on the right box, it is with the small crown that we will select the letter or the number (in our example the "R" then on the next box the "S").
When the airport (or waypoint) code is complete, press the ENT button to validate the entry and go to the next line. Note that its name is displayed in the input window.
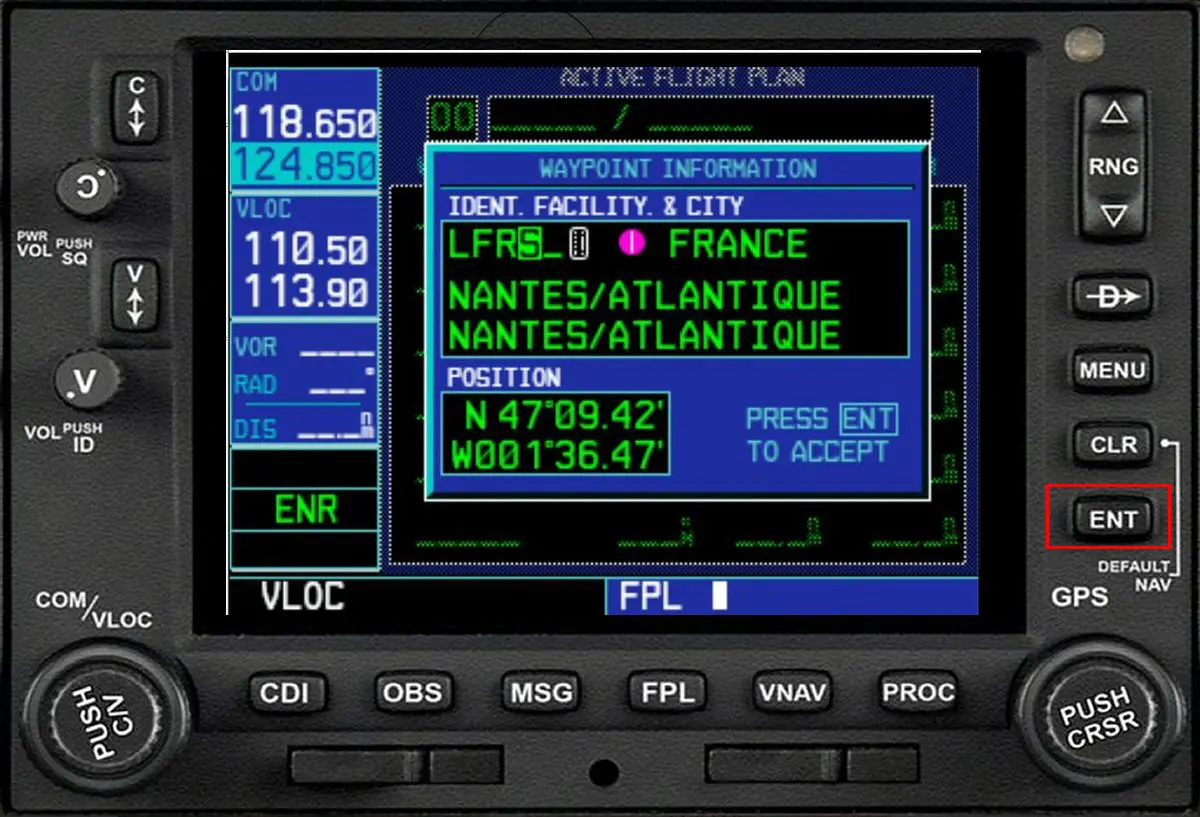
You continue in the same way, line by line, to complete your flight plan until you enter the destination airport.
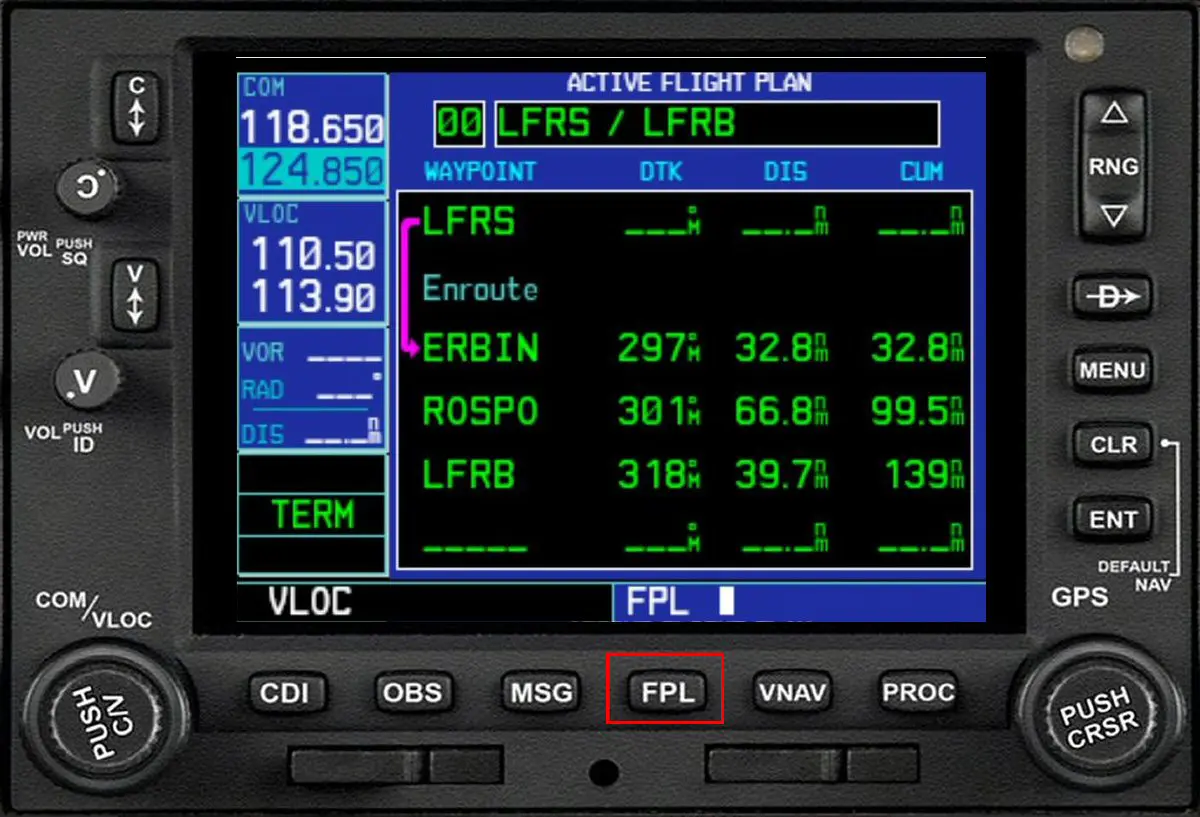
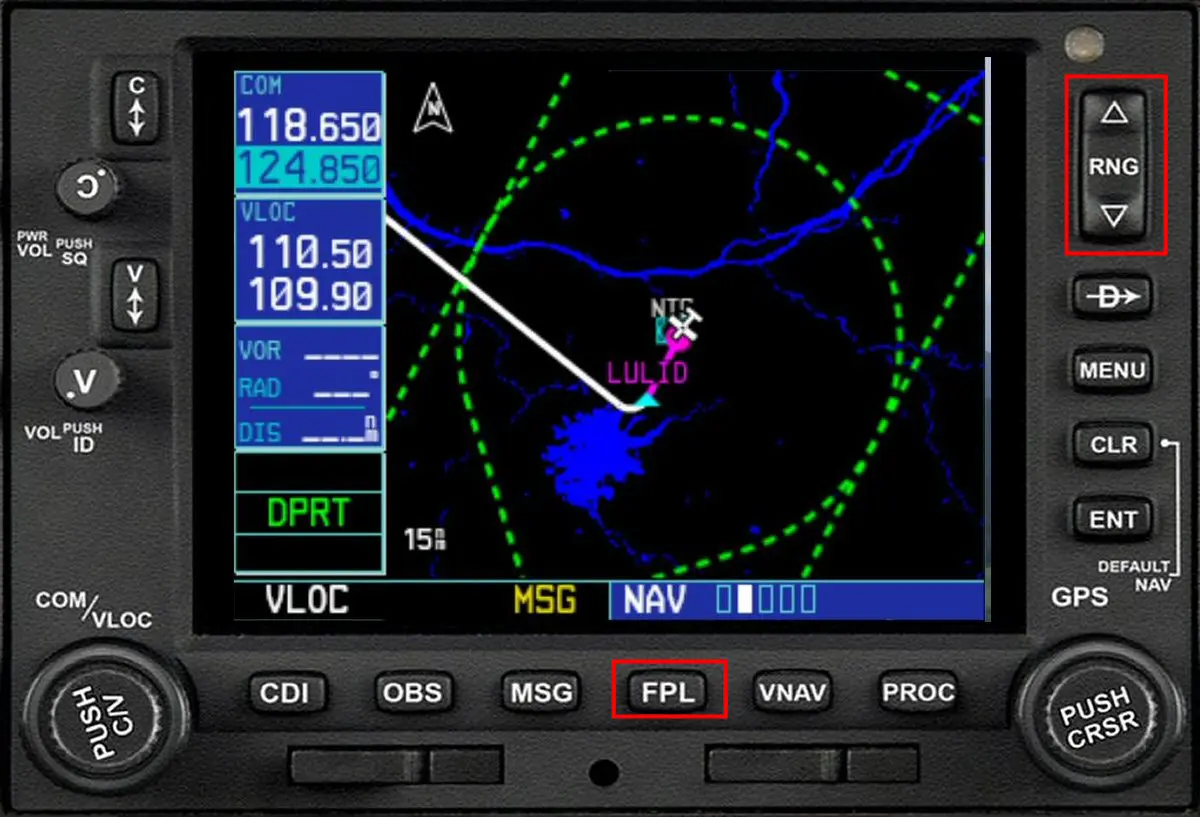
Pressing the FPL key displays the flight plan on the map. Pressing this key again allows you to return to the map.
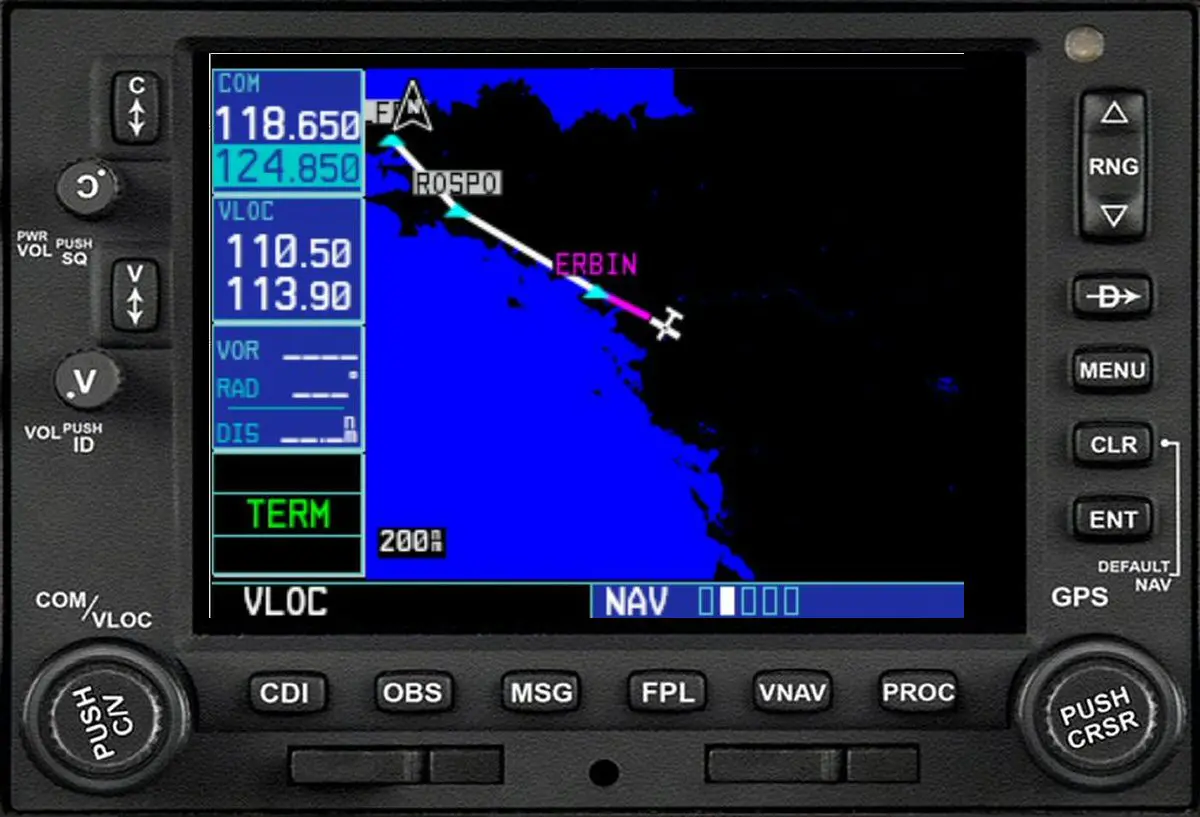
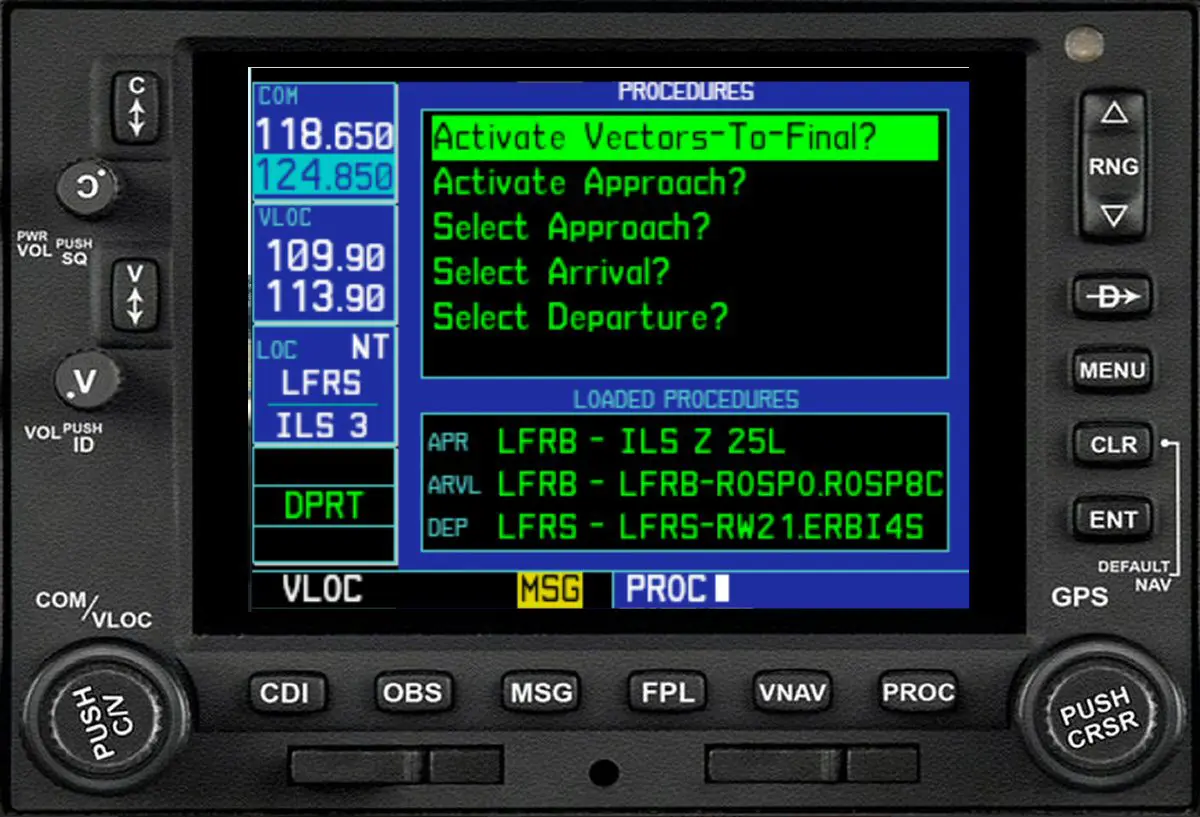
We will now enter the departure, approach and arrival procedures. Pressing the PROC key displays the procedure selection page.
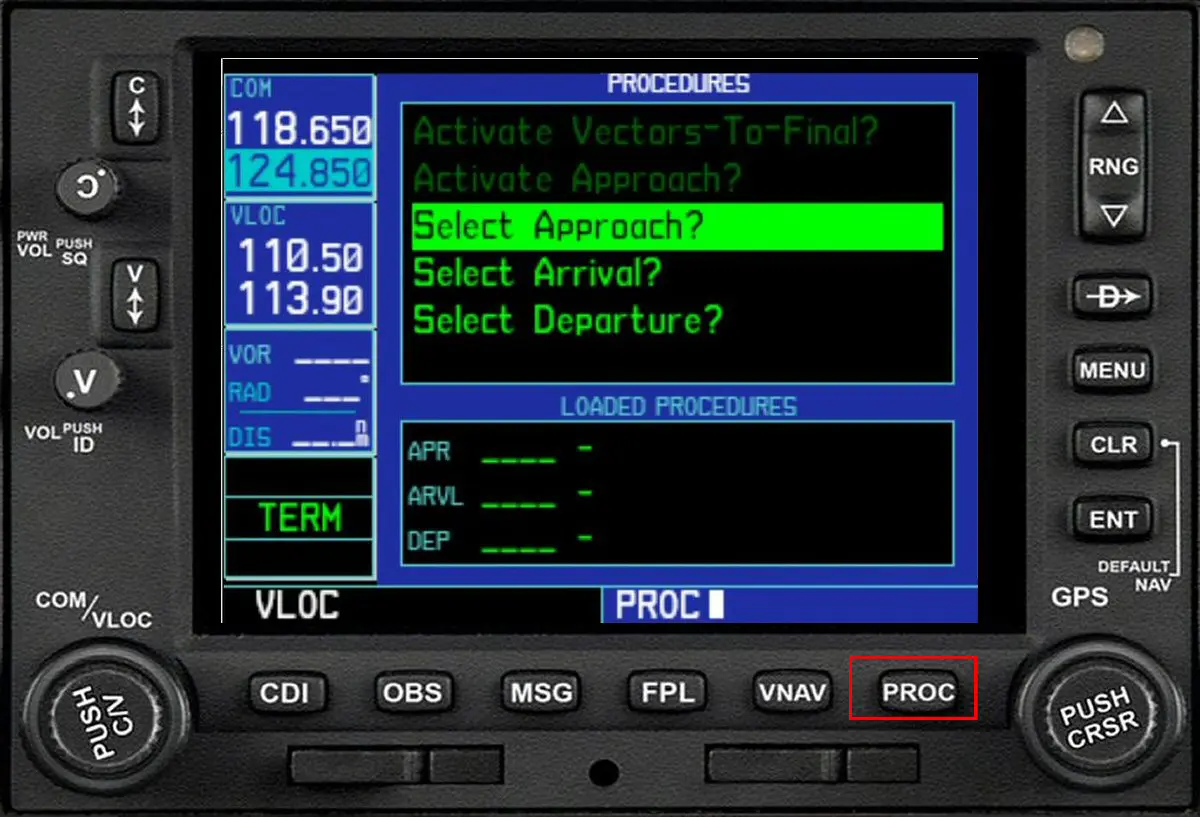
With the large crown of PUSH CRSR, we will select the line "Select Departure" and validate the selection with press ENT.
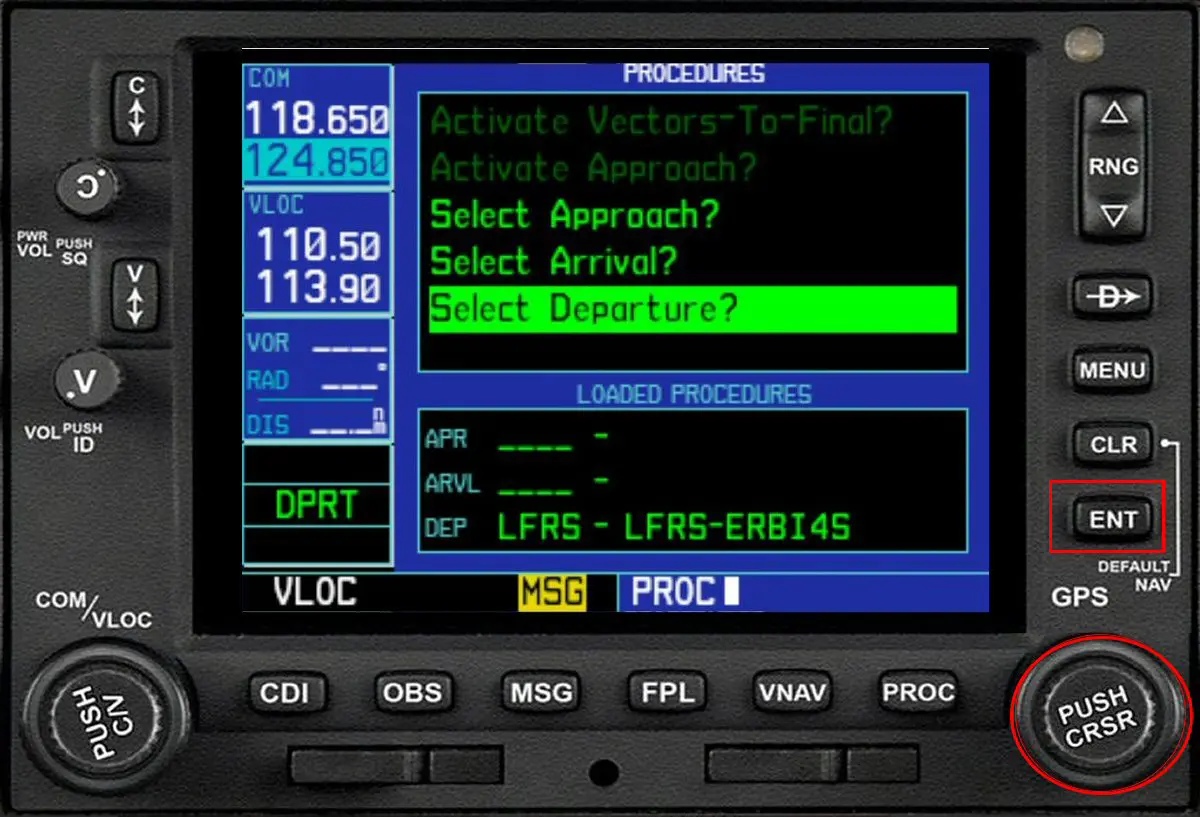
A new window is displayed with the list of departure procedures for the selected airfield (here LFRS).
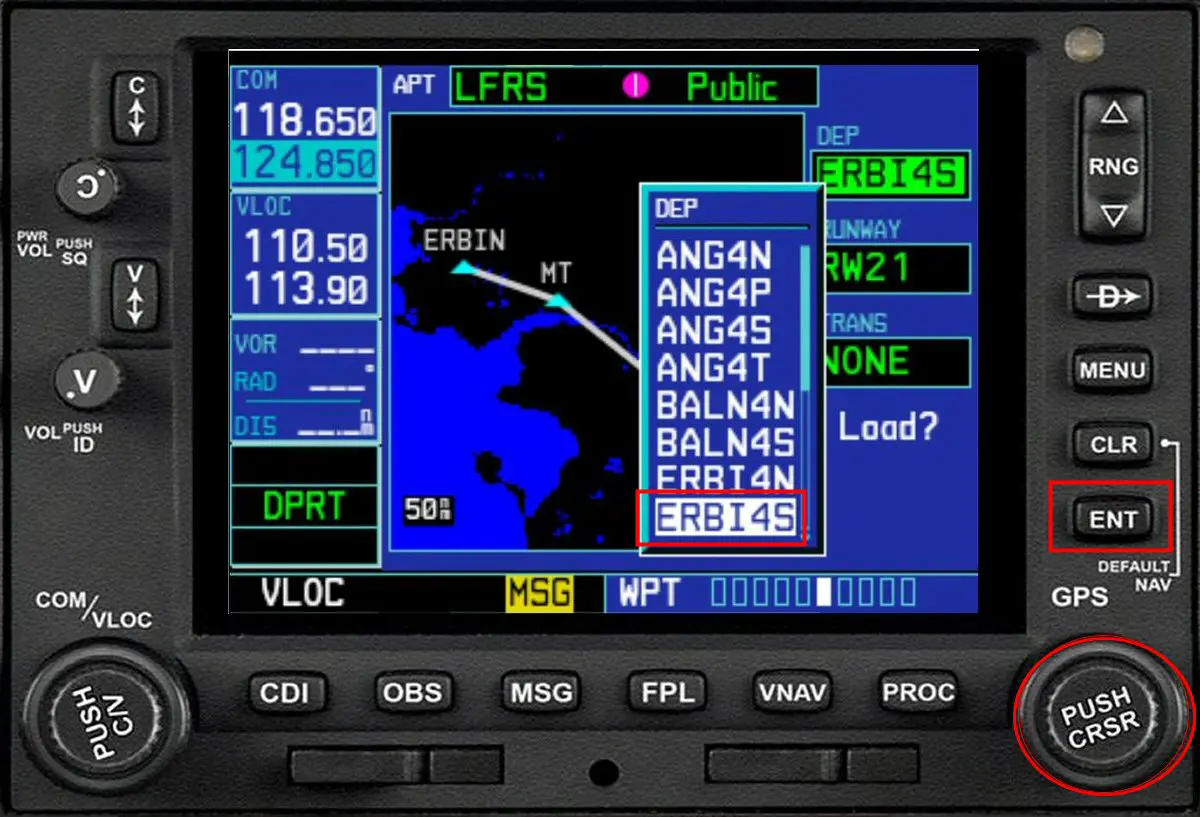
The selection (here ERBI4S) is made by turning the large crown then pressing the ENT key. You must then choose the take-off runway. The procedure selected tells him which runway to take, so it is 21 which is proposed and which must be validated by pressing ENT.
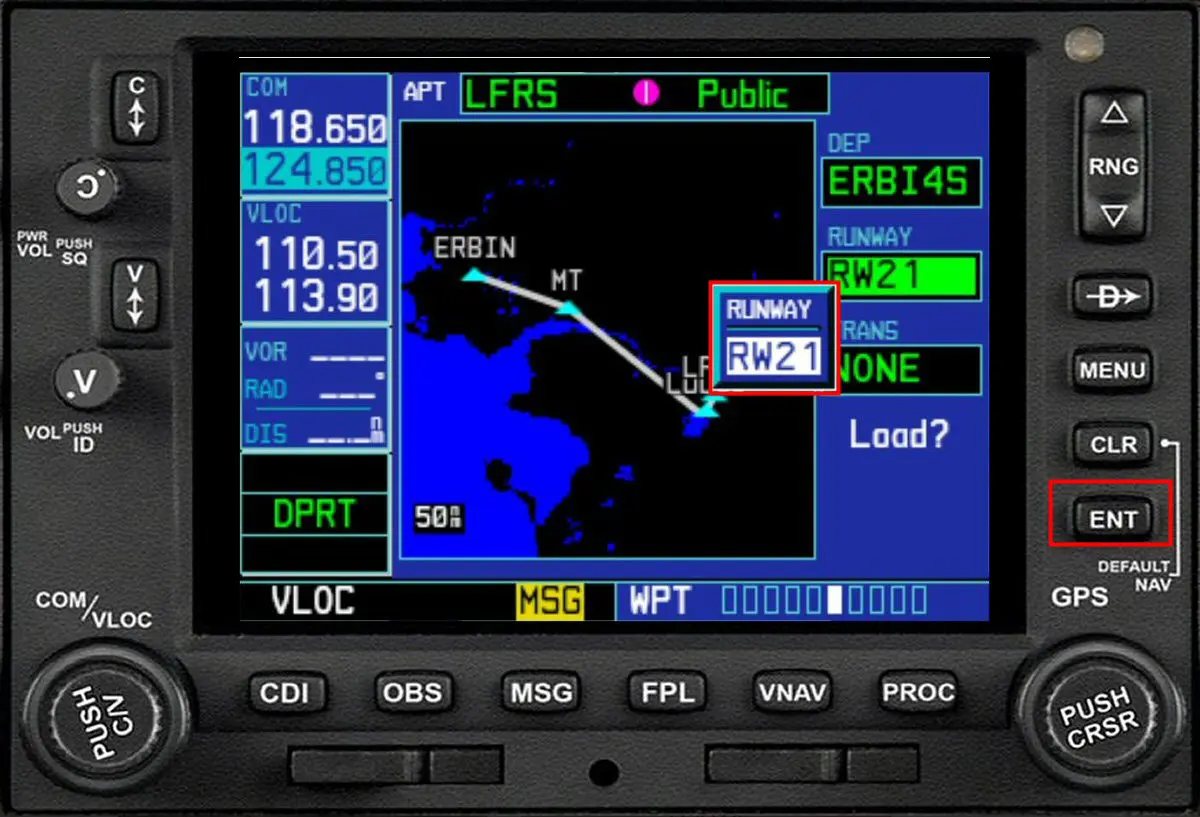
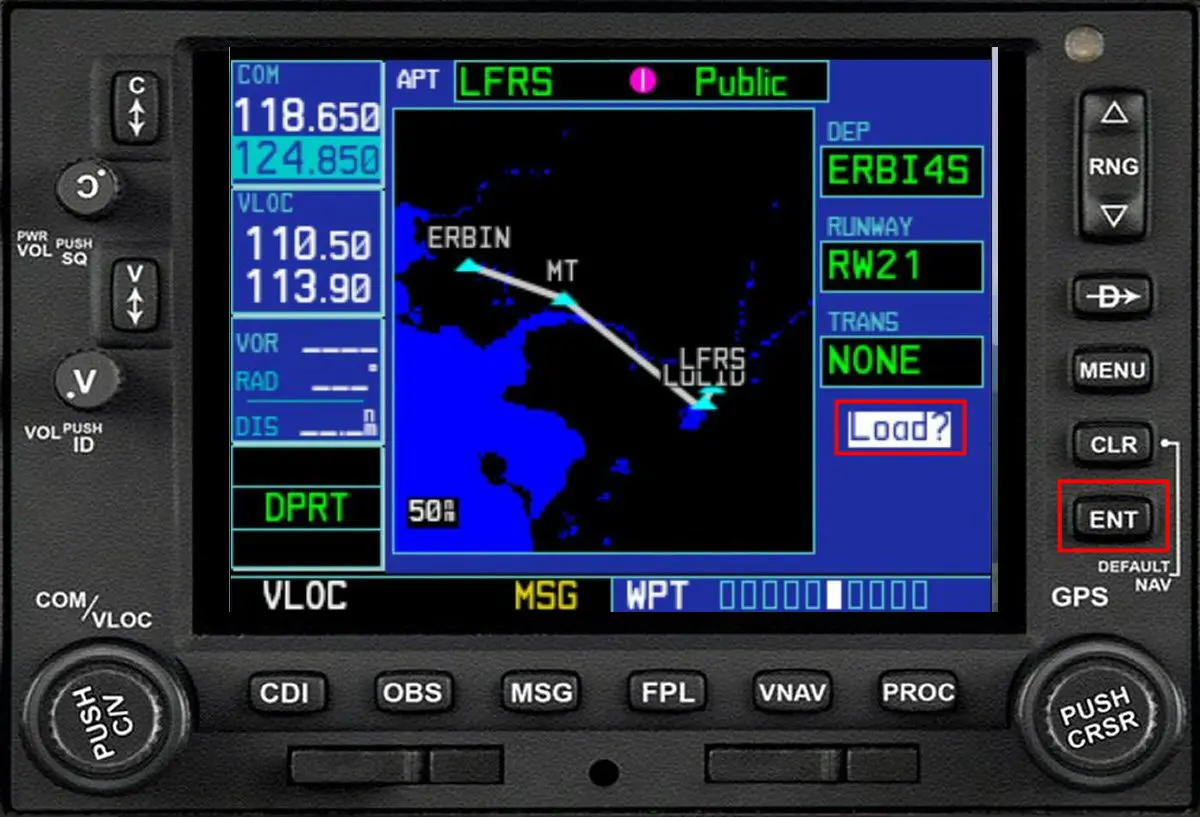
The procedure will be completed by validating with ENT the question Load? asked on the following screen. It is displayed as a map for control.
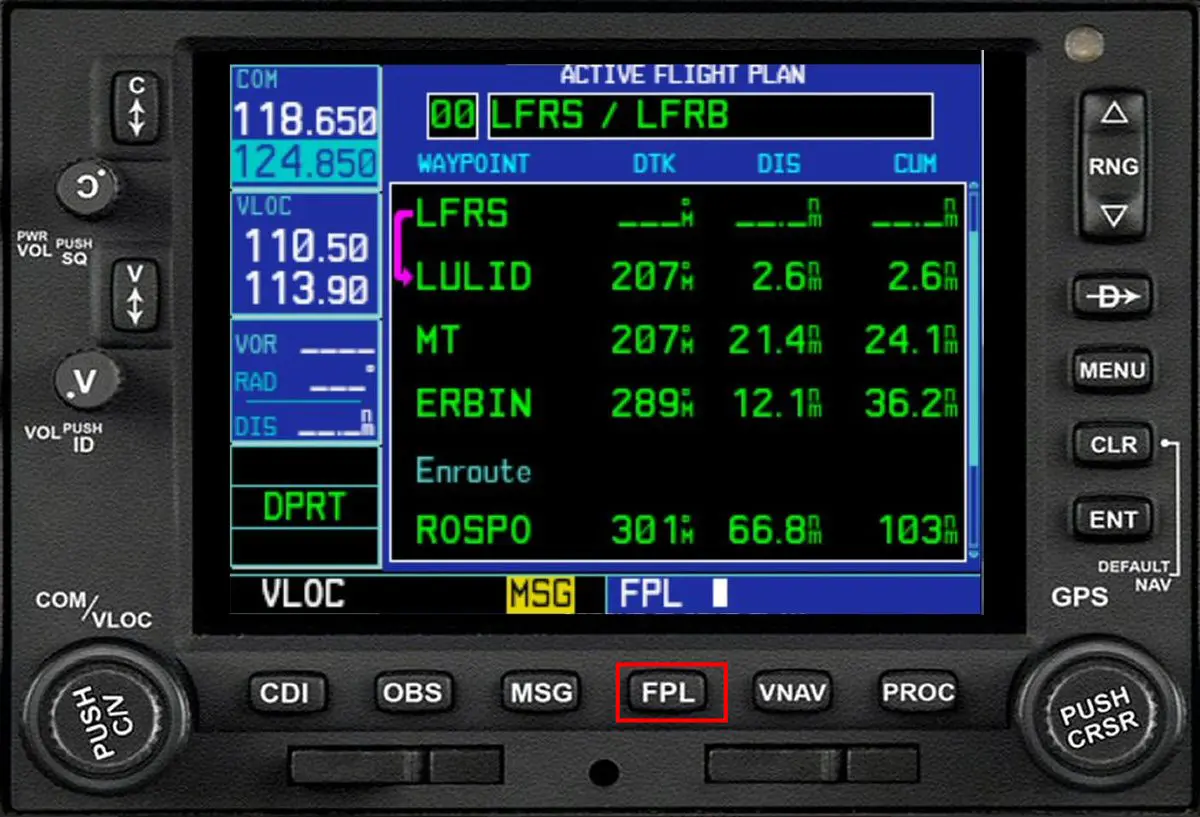
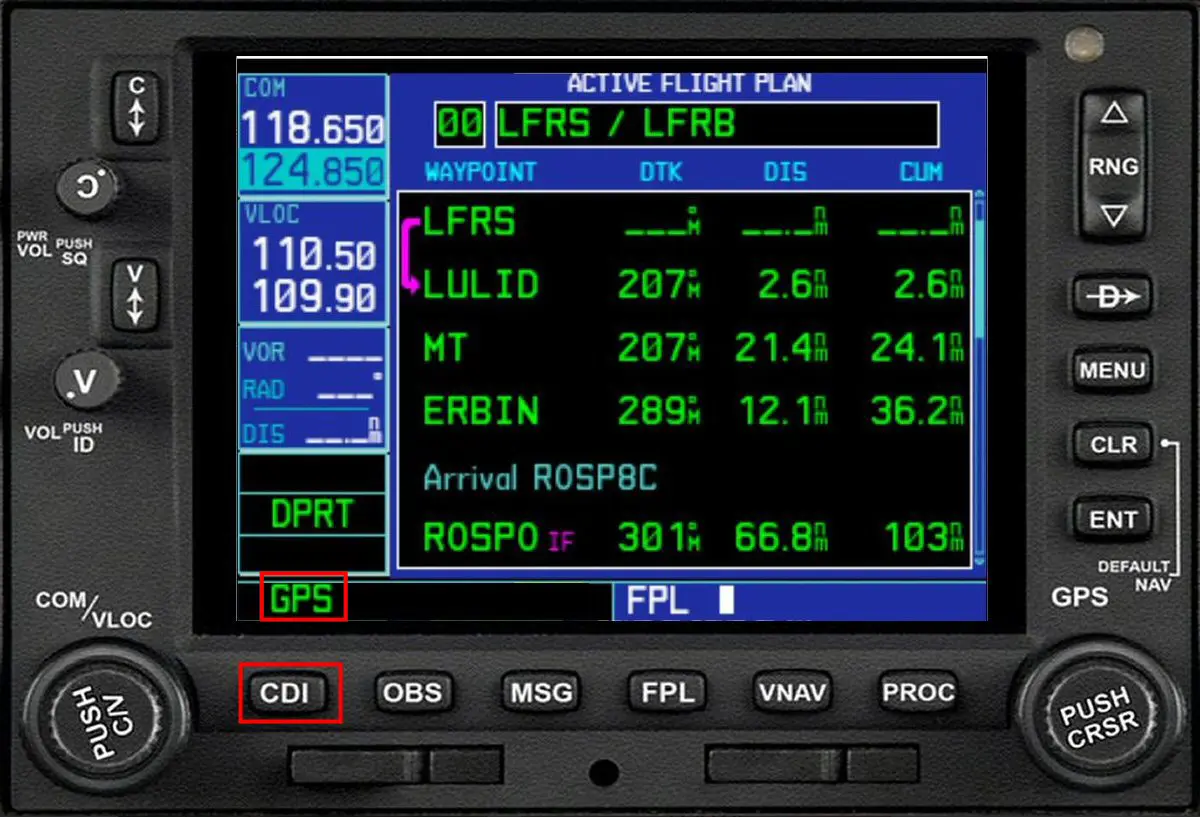
By pressing the FPL key, it can be viewed in text format (addition of WP LULID and MT).
You must then select the arrival procedure with the PROC key and the large crown of the PUSH CSRS button.
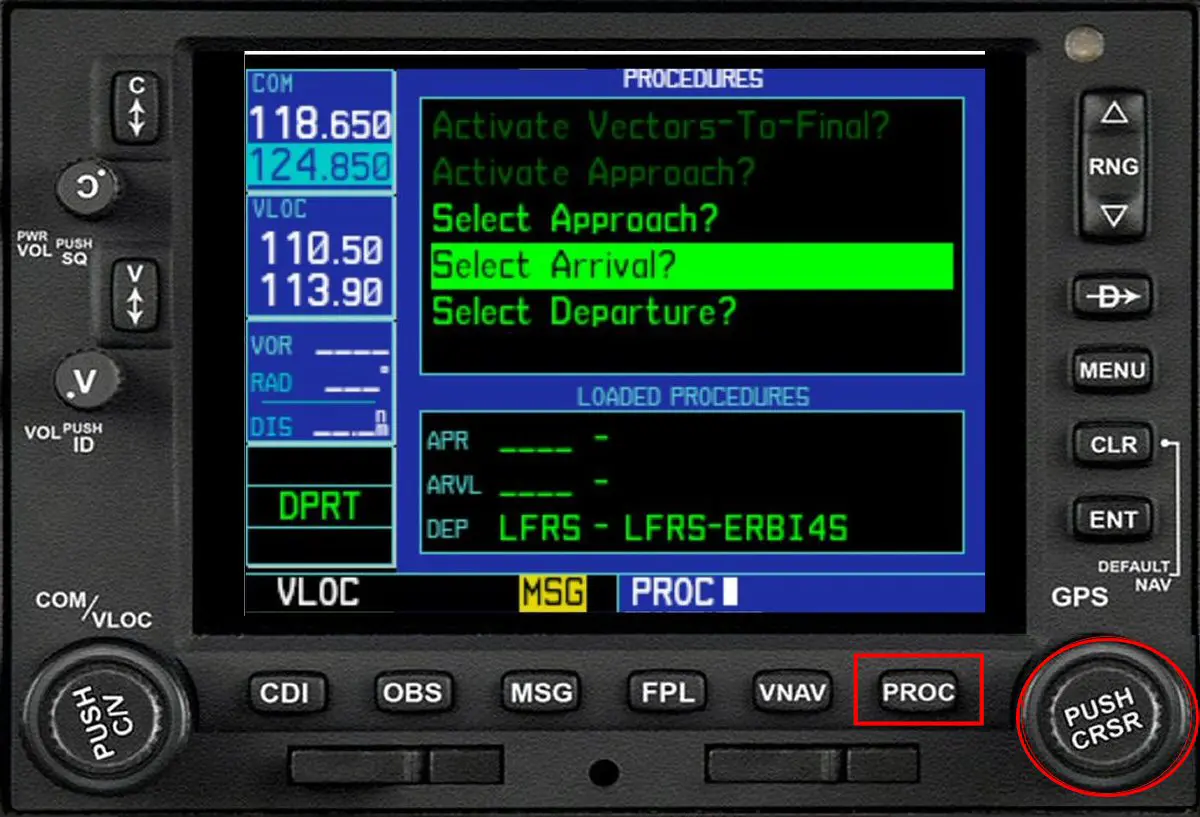
The procedure selection window that is displayed is that of the departure airport (1), so you must modify the selected airport by deleting this window with CLR.
(1) We think it's a bug because it's the only GPS to react like this. Knowing its destination, the GPS should offer arrivals from that destination.
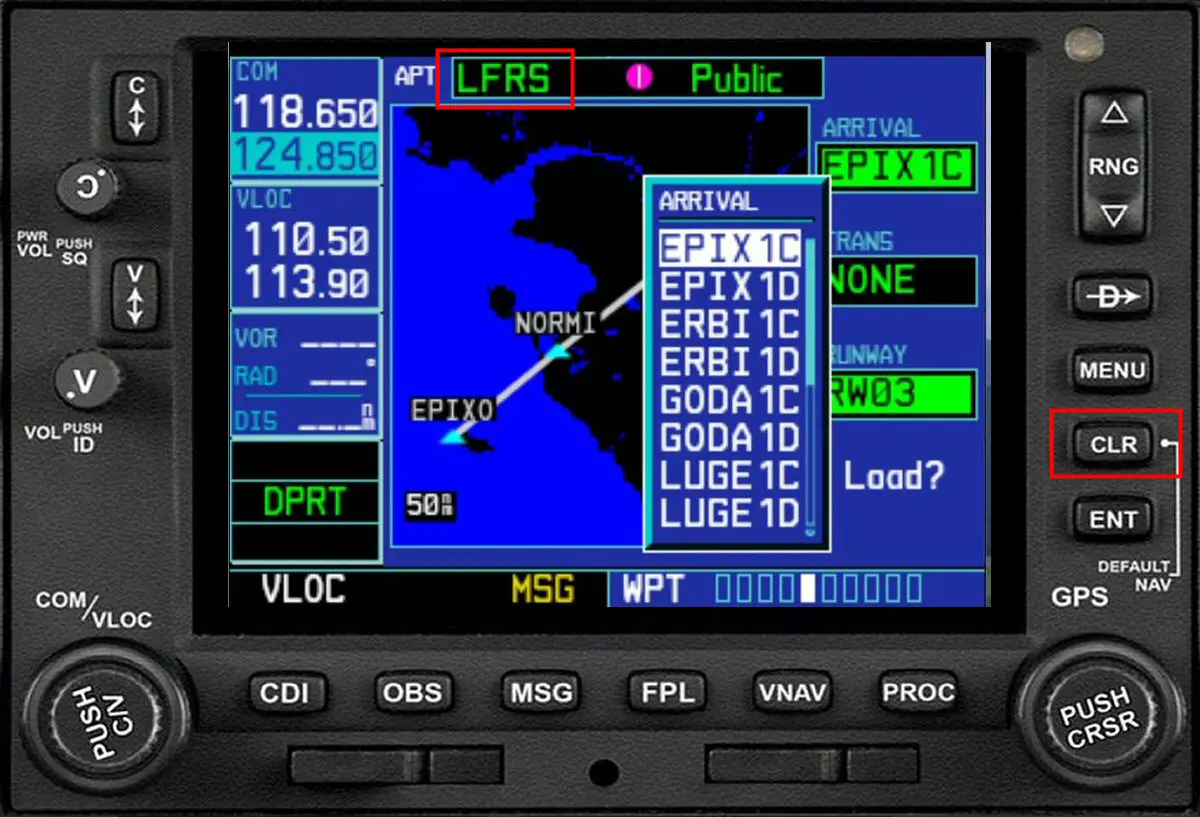
Then, with the large crown of the PUSH CRSR button, the selection is moved up to the ICAO code of the airport to highlight it and be able to modify it.
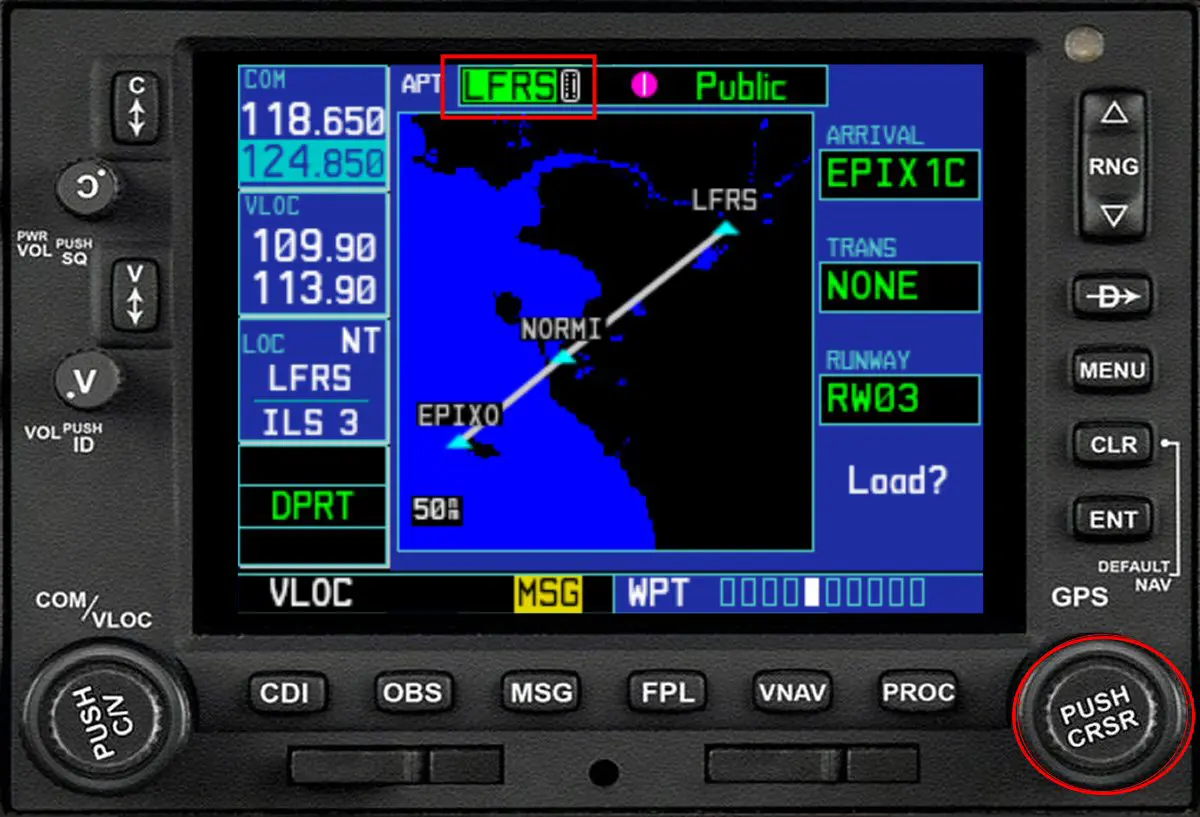
All that remains is to position yourself with the large crown on the first letter to be changed and with the small crown to modify it. When the airport code is correct, we validate with ENT.
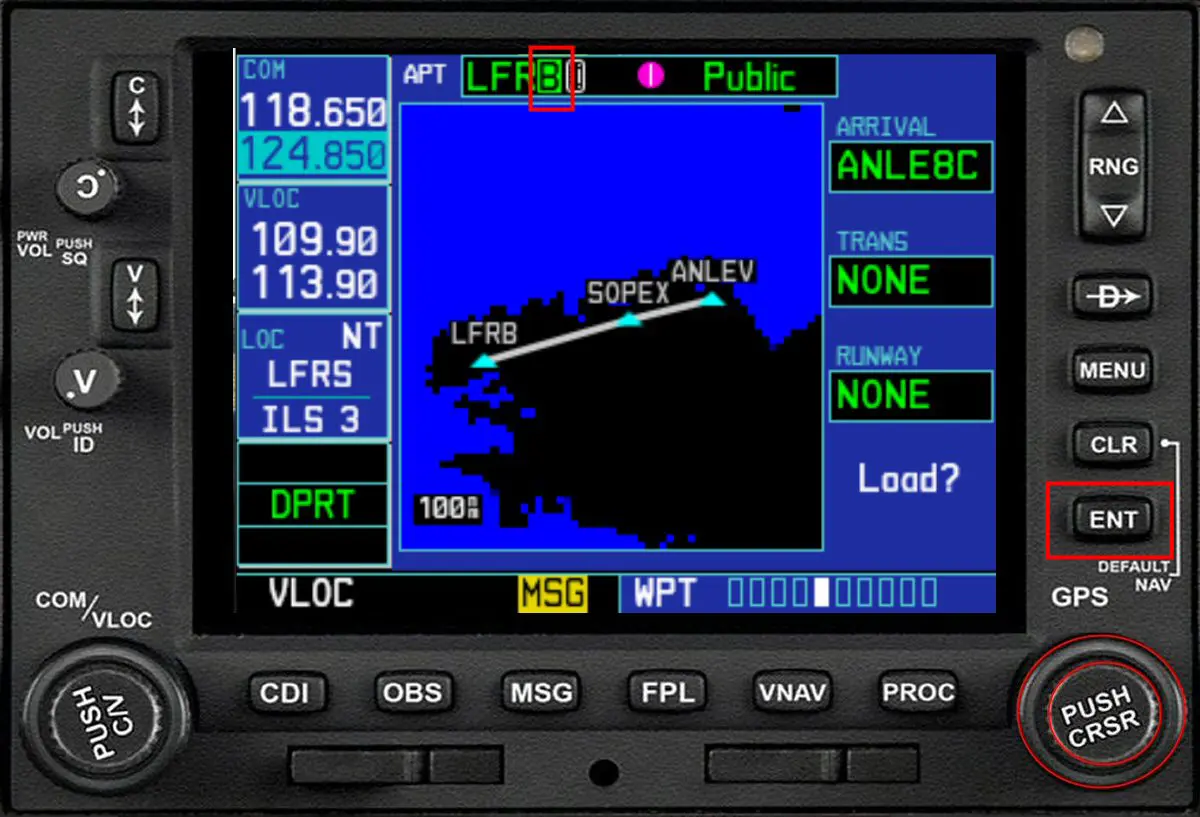
The first procedure for this airport is displayed and you press PUSH CRSR to open the selection window.
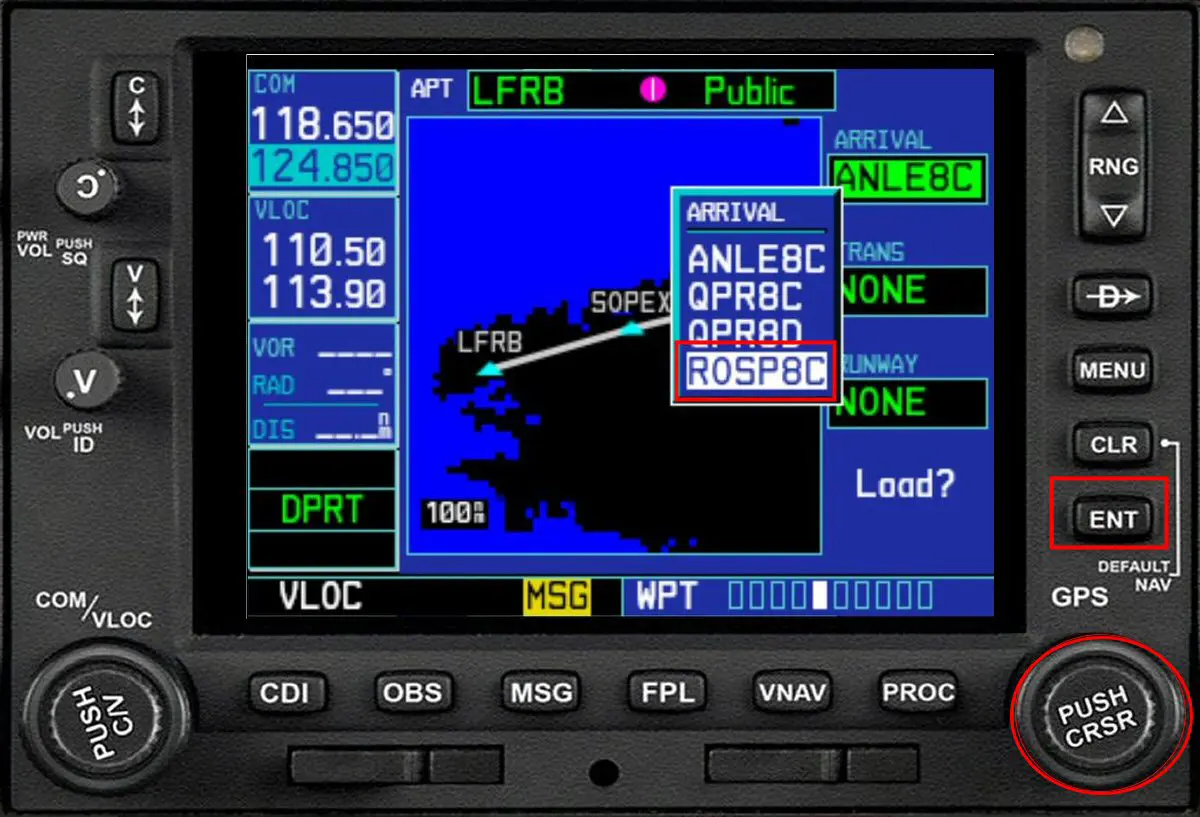
Selection (large crown) validation (ENT) of the arrival procedure (here ROSP8C) then again ENT to finalize (validate LOAD?).
Opening the graphics window allows you to check the procedure. You can also check the flight plan by displaying it in text mode (FPL key) then selecting the front row with the PUSH CRSR button and unrolled with the large crown.
Being well positioned on the arrival airport (LFRB in our example), we will be able to complete the flight plan by adding the approach procedure which will be ILS Z 25L.
The process is the same as for the start and finish by pressing the PROC button, selecting the line "Select Approach", by choosing the "ILS Z 25L" procedure. A window opens to choose "the transition".
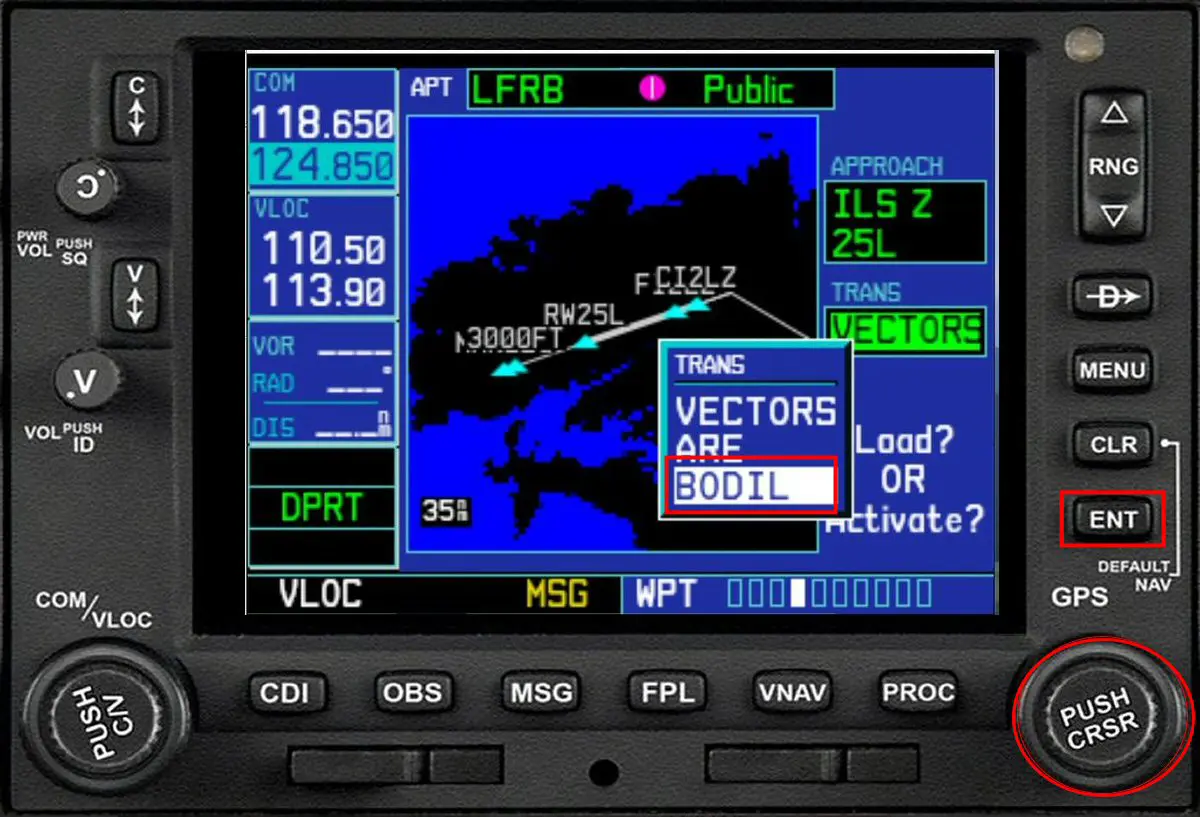
Selection with the large crown of the transition (here via "BODIL"), validation by ENT which opens a window with the complete graphic representation of the finish.
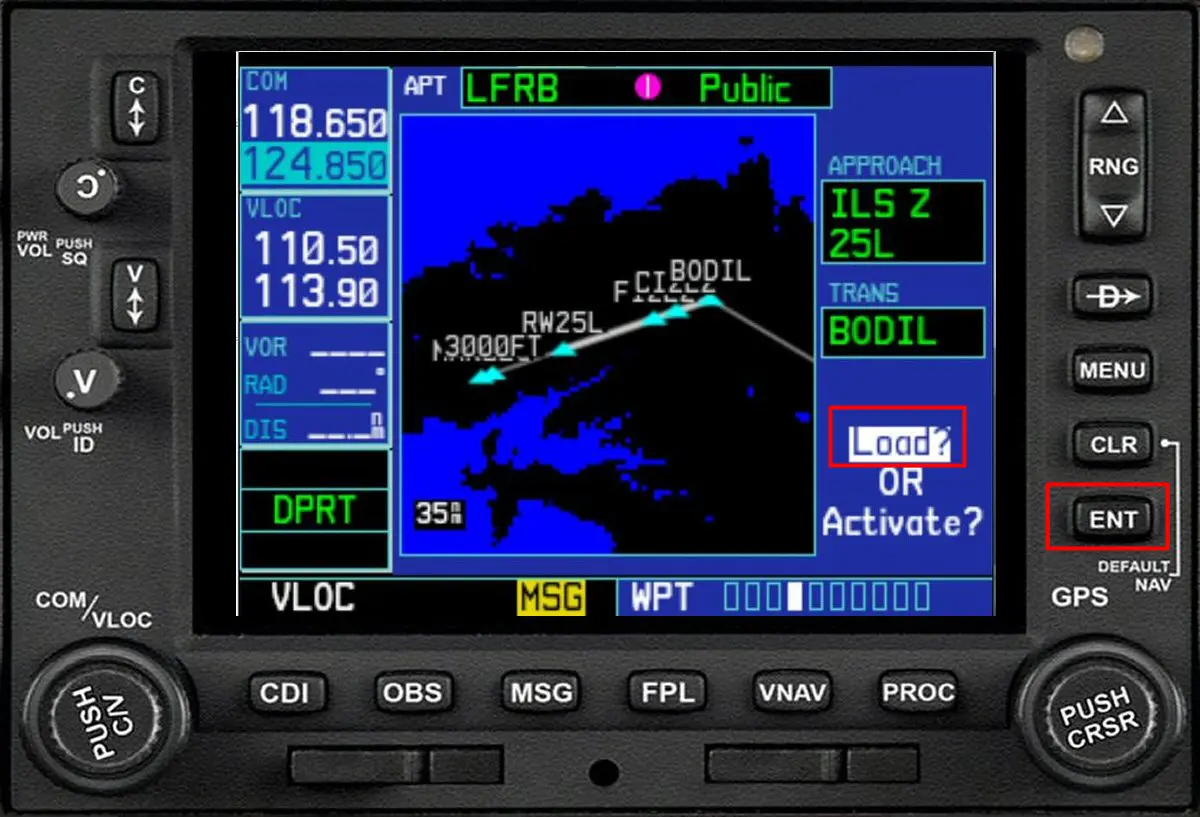
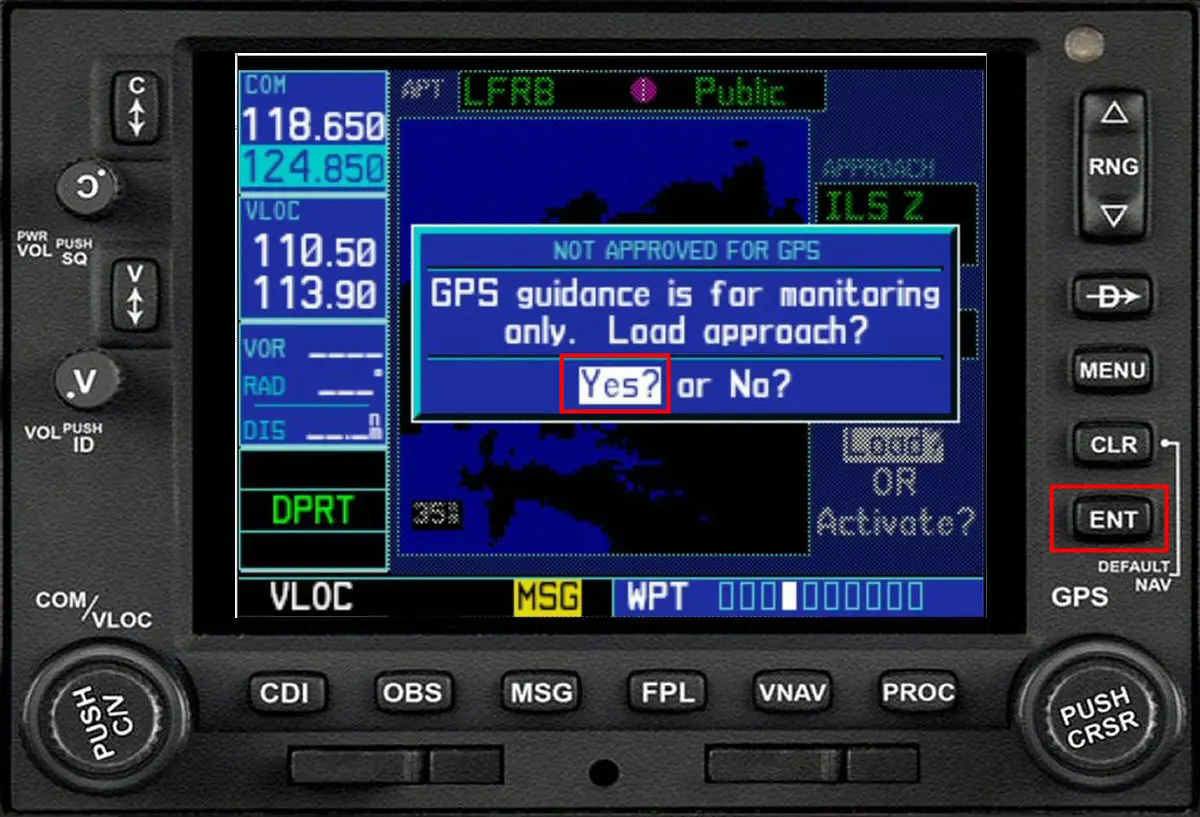
Be careful to validate "Load?" by ENT and not "Activate ?". Also press ENT to validate the next question.
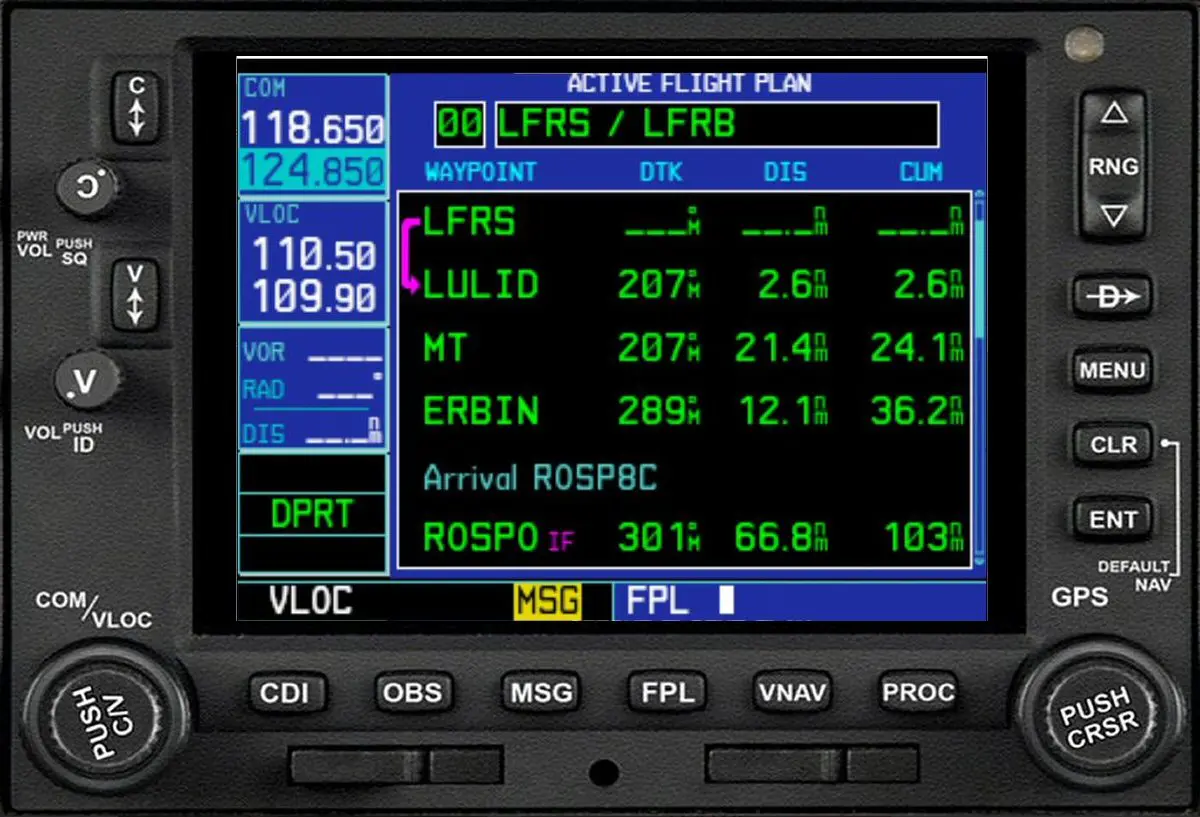
Which displays the final flight plan in text...
... or as a graph (FPL and RNG buttons for zooming).
Pressing the PROC button gives the list of recorded procedures and, for the end of the flight, the possibility of activating the final.
The flight plan intro in the GNS530 is complete.
NB: to date, the flight plan cataloging functions are not operational.
Part 2: using the flight plan with the PA28 autopilot
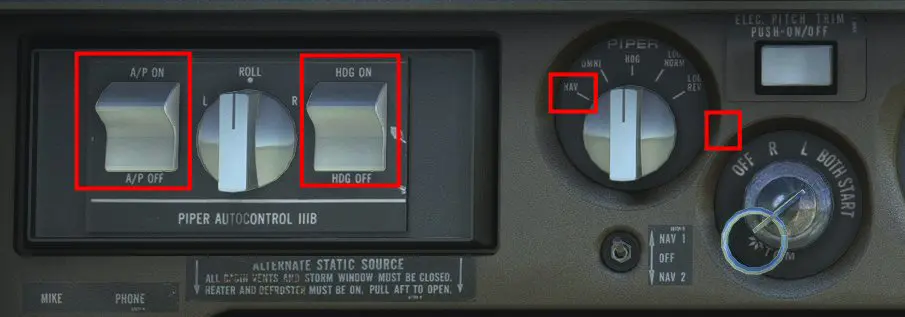
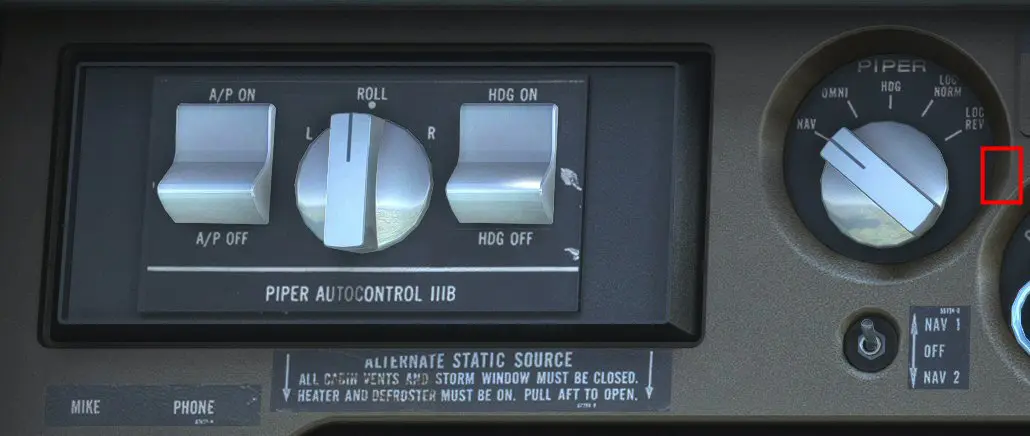
The PA28 Arrow IV is equipped with a "2-axis" autopilot which therefore does not manage altitude. Justflight has therefore added a function that allows you to maintain your altitude with a small area clickable to the right of the "PIPER" rotary switch.
Very important: before takeoff, the GNS530 must be switched to GPS mode by pressing the CDI button.
It is also necessary to adjust the heading indicator pin on the heading of the runway so as not to have any deviation before the engagement of the PA.
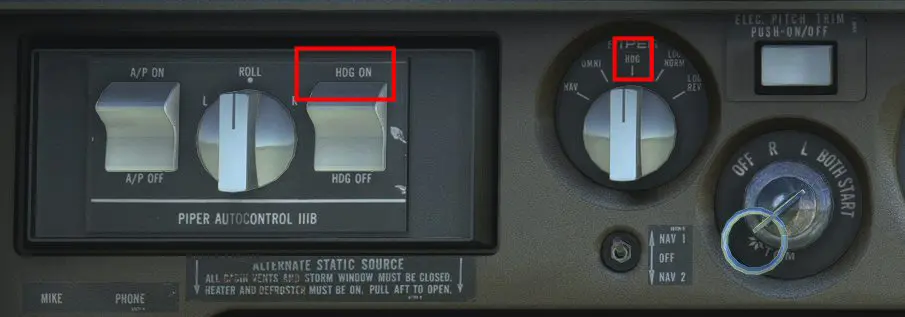
During the climb phase towards cruising altitude, position the "PIPER" rotary switch on HDG and switch the HDG switch to ON.
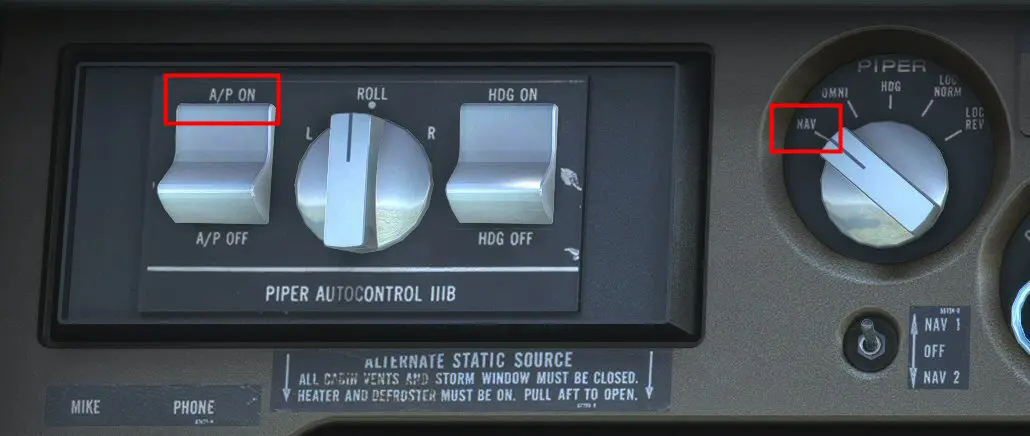
To engage the PA, you must put the A/P switch to ON and the "PIPER" rotary switch to NAV.
When the cruising altitude is on hold, click on the area added by JustFlight for altitude maintenance: the flight is "managed".
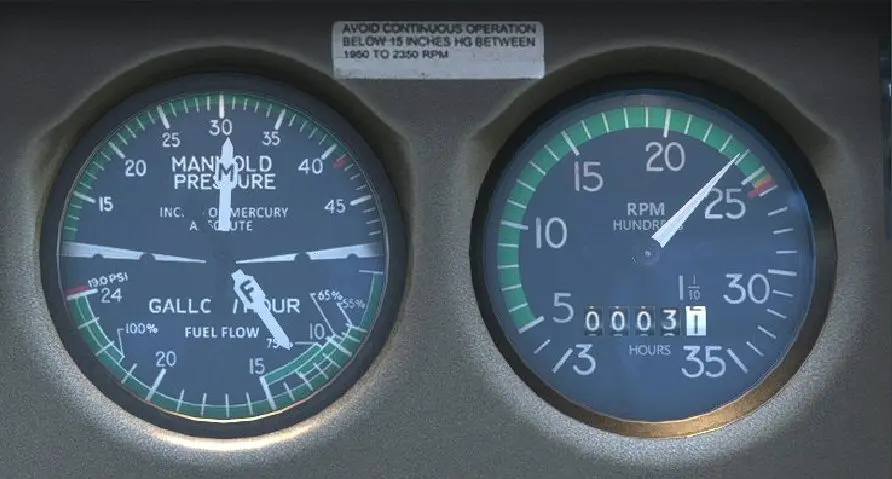
Bonus: below, view of the engine settings of the PA28 Arrow IV Turbo in cruise flight (settings used in real flight on the F-GFIZ of the Rennes Ille-et-Vilaine flying club).
- manifold pressure = 30"
- tachometer = 2400T
- flow (Fuel Flow) = 12 Gal
And for performance:
- VI = 140 Kt
- SV = 0
NB:
- the use of OMNI, LOC NORM and LOC REV positions are detailed in the manual provided by JustFlight.
- an additional tutorial will explain how to load a flight plan from Simbrief.